How to Mount an Action Camera on a Bike for UK Travel
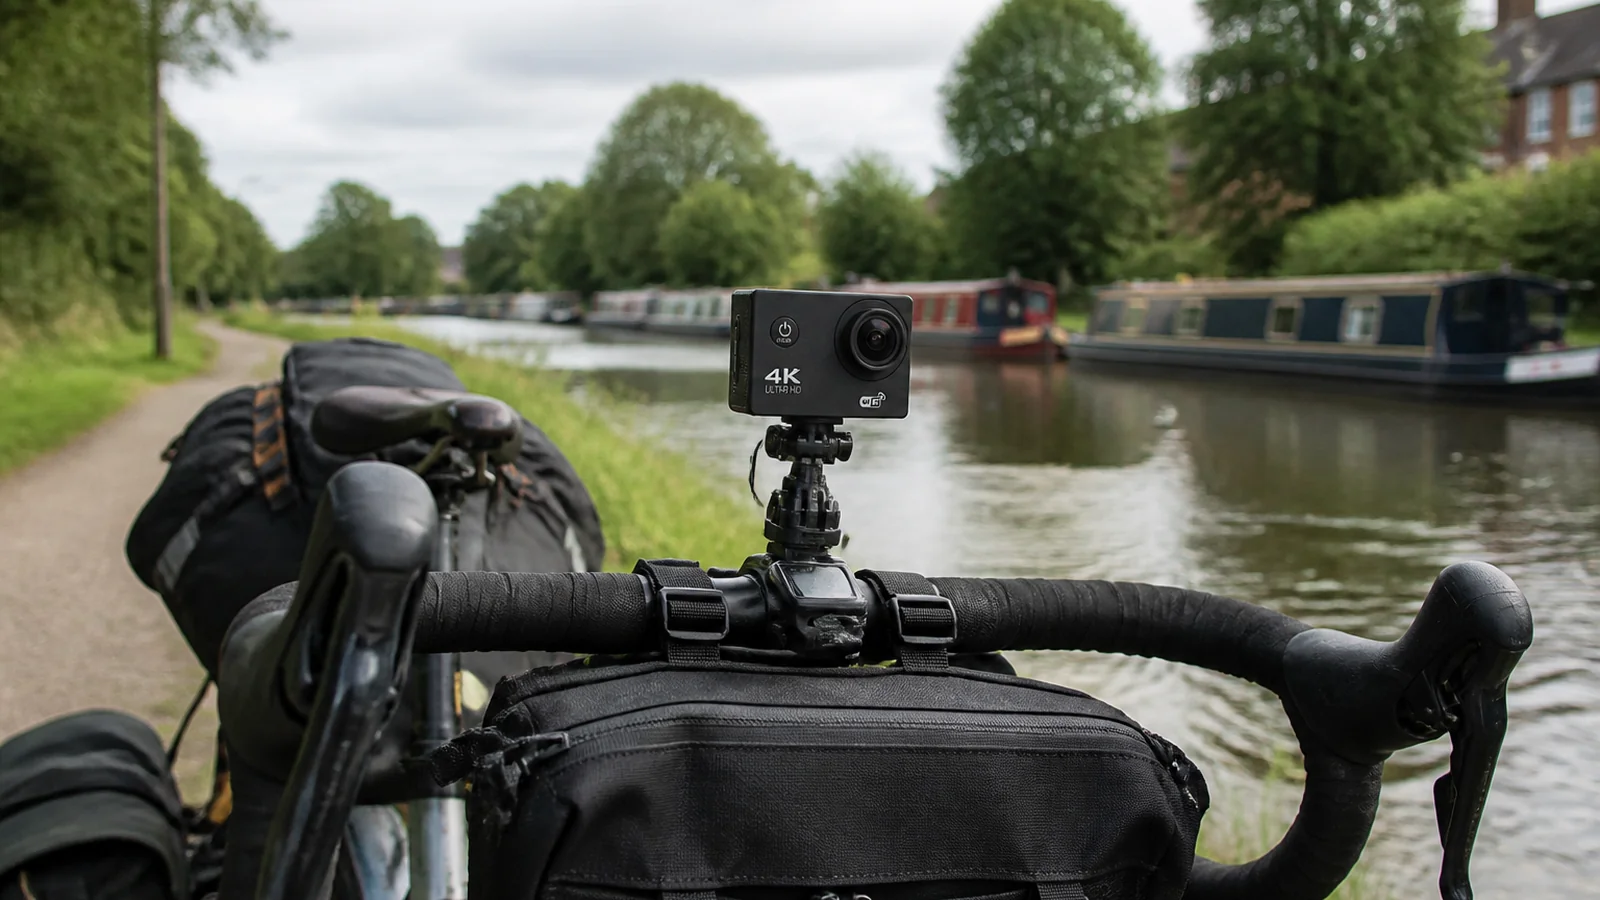
For bicycle travel filming in the UK, fix the camera with a handlebar or pole clamp (or a secure strap), keep mounts clear of brakes and cables, and start or stop recording with the wireless remote so you keep both hands on the bars. A 4K Wi-Fi action camera bundle such as the G200R is light enough for day tours—about 61 g for the camera body—but it has no electronic image stabilisation, so handlebar vibration will show on rough surfaces. Treat the kit as a travel diary tool for steady road pace, not a polished off-road highlight reel.
What this guide covers (bicycle travel, not motorbikes)
This checklist is for push-bikes and touring setups: city loops, canal towpaths at a gentle pace, and multi-day bagged rides. It is not a motorcycle mounting or helmet-law guide. The goal is a mount that stays put, does not foul controls, and lets you capture route context without fiddling with the camera while rolling.
A practical travel kit for this job usually includes a handlebar or pole clamp, straps, a wireless remote, and mounting clips. Those accessories ship with a 4K Wi-Fi action camera bundle such as the G200R, alongside the waterproof housing, USB-C cable, and manual. The fixed 140° lens is not adjustable, so aim once when you mount and check the frame before you set off.
Mounting checklist for UK bike travel
- Choose clamp or strap before sticky pads. Prefer the handlebar or pole clamp on round bars, stems, or seatposts that leave clearance for brake levers and shifters. Use the included straps for irregular tubes or soft bags when a clamp will not seat. Adhesive mounts are unreliable on dirty alloy, wet carbon, or cold mornings—do not trust them as your only hold for a full touring day.
- Fit the clamp firmly, then re-check after five minutes. Seat the jaws evenly, tighten until the camera cannot rotate by hand, and confirm bolts or levers have not loosened after a short shake of the bike. Re-check after the first few miles when vibration settles the hardware.
- Keep the path of cables, brakes, and bags clear. The housing and clamp must not foul brake cables, gear housing, lights, or pannier straps. Leave room to reach the brake levers without brushing the camera.
- Aim for travel context, not a cinematic chase. Point slightly ahead and a little down so the road and front wheel enter the frame. With a fixed 140° view you cannot zoom; if the bars dominate the shot, raise or shift the clamp rather than “fixing it later”.
- Use the wireless remote for start and stop. Strap or clip the remote to a wrist or the bars so you can record without unlocking a phone. Wi-Fi is optional for preview or file transfer on a compatible phone when you are stopped—follow the manual—and leaving Wi-Fi on drains the single 900 mAh battery faster.
- Add a safety-line habit even with a light camera. At about 61 g the body is easy to carry, but a drop onto tarmac still ends the day. If your clip or cage accepts a tether, use it. At stops, confirm the clamp has not walked open.
- Match resolution and battery to the ride length. MP4 H.264 recording includes 4K30 and other listed modes; 1080p is a useful travel default when card space or heat matters. Expect roughly 90 minutes of 1080p from the 900 mAh cell, with USB-C charging about three hours at 5 V/1 A. The included 64GB TF card covers short travel clips if you export regularly rather than leaving the camera rolling all day; 4K fills space faster, so drop to 1080p when you need longer files.
- Decide shell on or shell off before you roll. The waterproof case is required for underwater use when correctly sealed (up to 30 m). The camera body must not go in water on its own. On dry land rides you may leave the housing off for easier access and less muffling of sound, accepting that the shell is what provides the stated underwater protection—not splash proofing of a bare body.
Shake expectations without electronic stabilisation
Because there is no electronic image stabilisation, handlebar buzz and cobbles transfer into the footage. Slow road touring, canal paths, and scenic stops are realistic uses. Expect choppier results on gravel, broken lanes, and fast descents over potholes. If the ride is about remembering the route rather than publishing a smooth edit, handlebar mounting still earns its place—just set that expectation before you ride.
Boundaries
- This article covers bicycle travel mounting only—not motorcycle setups or helmet legal rules.
- No electronic image stabilisation: do not expect cinema-smooth handlebar footage on rough surfaces.
- The lens angle is fixed at 140° and is not adjustable.
- The camera body must not be immersed; underwater use needs the sealed waterproof housing (up to 30 m when correctly closed).
- Single 900 mAh battery; 1080p recording around 90 minutes; USB-C charge about three hours at 5 V/1 A—plan spare charging time on multi-day trips.
- Adhesive pads alone are a poor primary mount for UK touring weather and dirty bars.
FAQ
Is a handlebar clamp enough for a week-long tour?
It can be, if you re-check tightness daily, keep the clamp clear of controls, and use a strap or tether habit. Swap to a strap mount where a clamp cannot seat safely. Confirm before you rely on it for a full touring day.
Should I film everything in 4K30?
Use 4K30 when you want maximum detail and have card space. For long days, 1080p in MP4 H.264 is often the more practical travel mode with the single battery.
Can I start recording while riding?
Prefer the wireless remote with both hands remaining on the bars. Stop in a safe place for menu changes on the 2.0-inch non-touch IPS screen.
When you want a travel-ready bicycle kit with clamp, straps, remote, and housing in one box, see the 4K Wi-Fi action camera bundle — a 4K Wi-Fi action camera bundle such as the G200R includes those mounts for UK bike travel, without electronic image stabilisation.